Time for a Change
As you read this blog post, you may come across things that are incorrect or that could have been done much better. If this is the case, please feel free to reach out to contact@bebop831.com
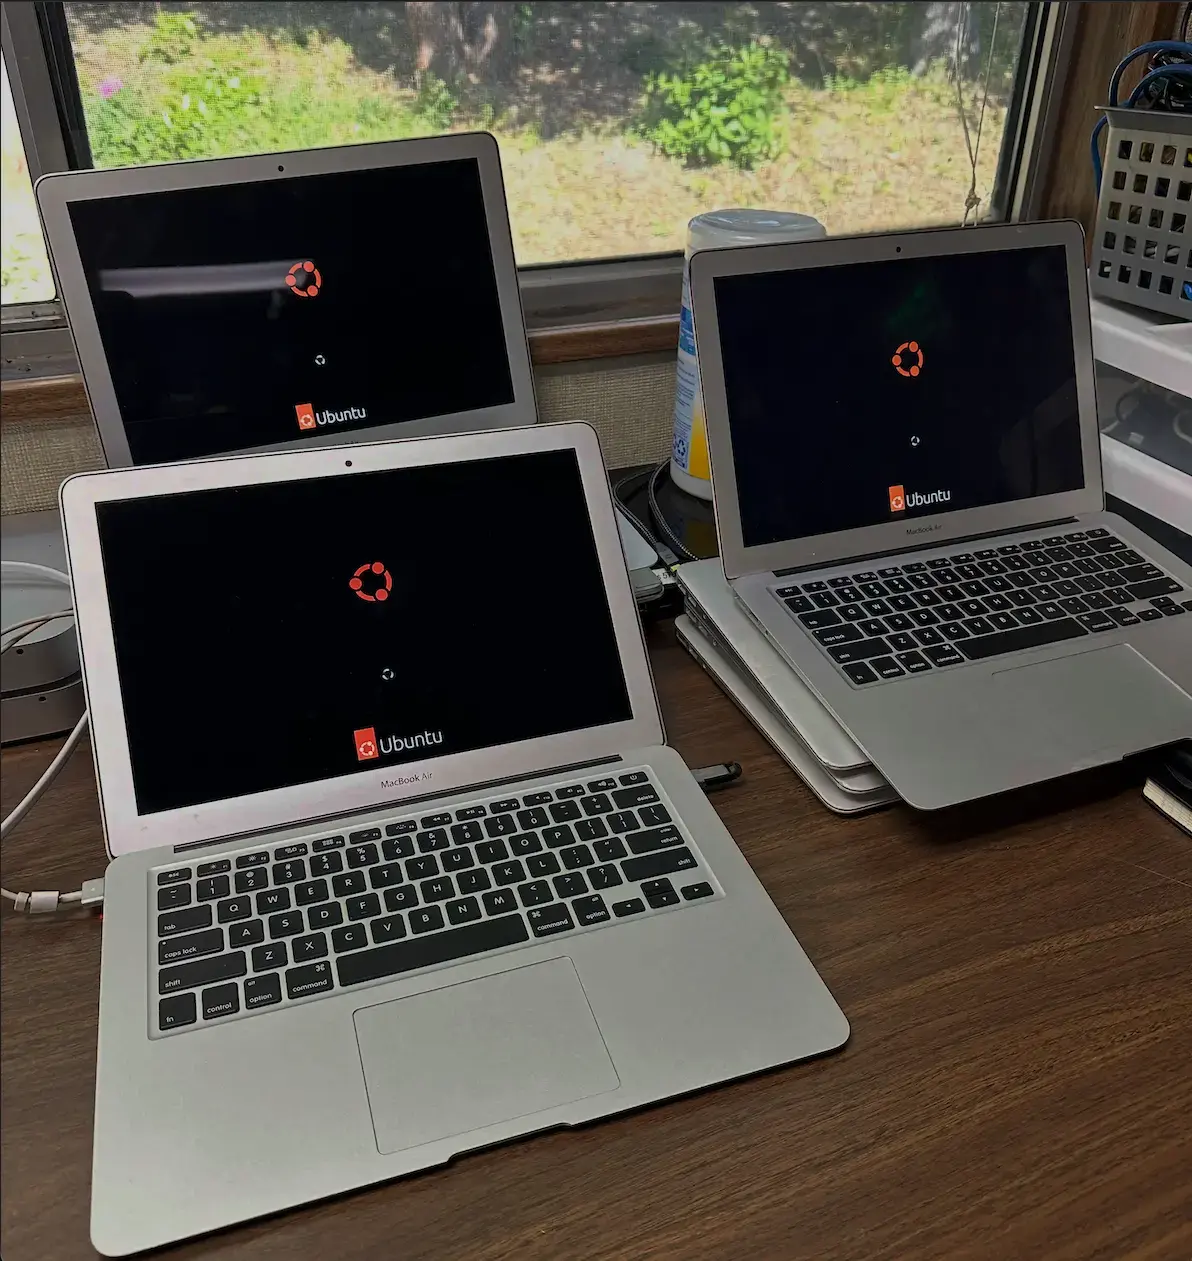
As the IT Admin for a tiny school district, I’m responsible for all the tech onsite. Recently, I was tasked with refreshing the student laptop fleet, about 35 MacBook Airs (2017, A1466).
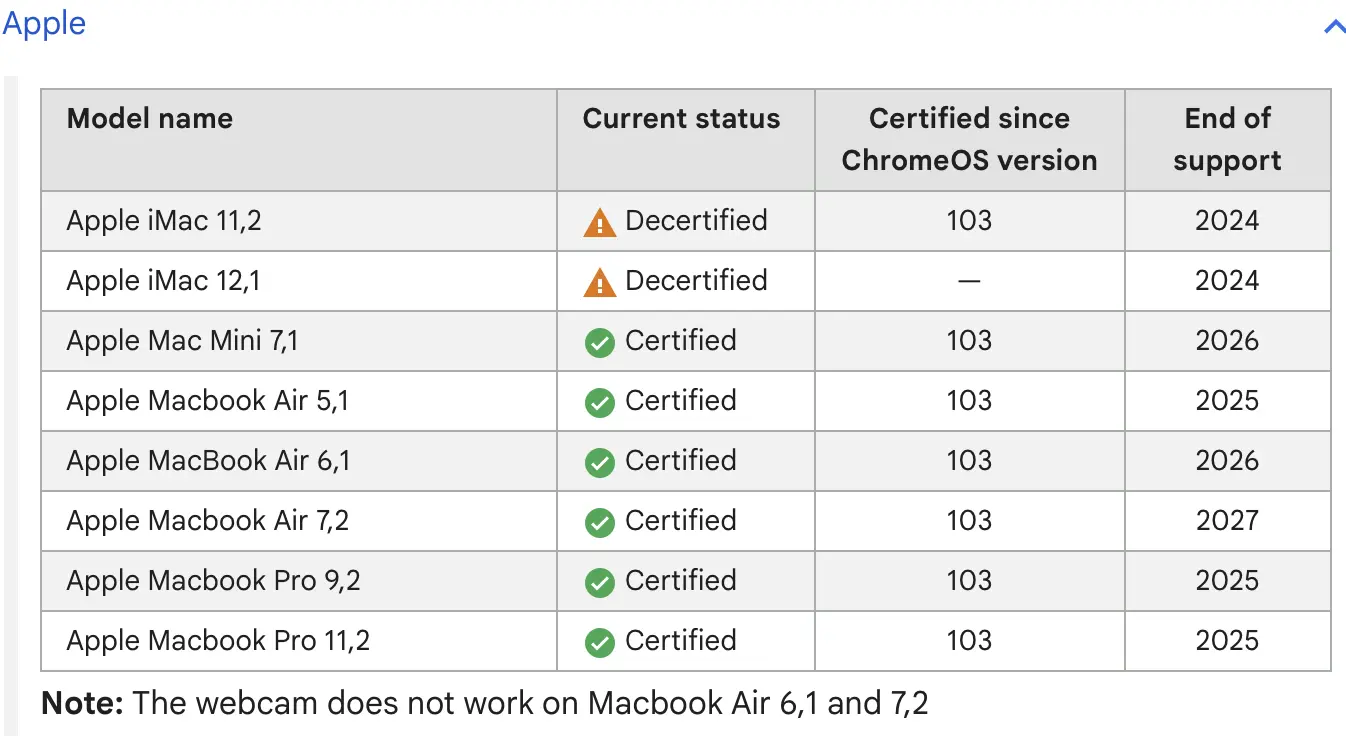
The obvious path seemed to be Chromebooks. They’re usually cheaper than other devices on the market and, as a result, very popular in K-12. However, when I compared this MacBook model with a popular modern Chromebook, I was surprised at how well the MacBook held up:
| Spec | MacBook Air 2017 (A1466) | Dell 3120 Chromebook |
|---|---|---|
| CPU | Intel Core i5 (I5-5350U) | Intel® N100 |
| Memory | 8 GB LPDDR3 | 4 GB LPDDR5 |
| Storage | 128 GB SSD | 64 GB eMMC |
| OS | Monterey 12.7.6 | ChromeOS |
After discussing with staff and looking back at the most common problems I saw in my first year, I narrowed the refresh down to the following requirements:
- Basic web computing - Anything a Chromebook can do (i.e., Google Apps, web, video, documents, etc.)
- Must run state testing software - Standardized exams/assessments require specific software.
- Shared device model - Students can grab any laptop and access resources via their cloud identity.
- Low Cost/Free/FOSS (optional) - A tiny school district means an even tinier IT budget.
As long as I was able to satisfy these requirements, I had the freedom to experiment.
Same Device, New OS
Support for macOS Monterey ended shortly after the release of macOS Sequoia and is now considered EOL (end-of-life). According to Apple’s security updates page, the last mention of Monterey occurred in September 2024. This means that macOS Monterey is no longer receiving updates, and software vendors will likely drop support in the near future if they haven’t done so already.
My first choice for replacing the current OS was ChromeOS Flex. Google offers a stripped-down version of ChromeOS that you can flash onto a USB drive and install on your outdated fleet of devices.
Perfect, right? Wrong!
Unfortunately, ChromeOS Flex does not support the FaceTime HD webcam on this model of MacBook. Since having a functional webcam was one of the defined requirements, I needed to start looking at other options…
Then I considered Linux.
Why not? Linux has come a long way since these MacBooks were first released.
I will admit, I’m biased. I daily-drove Debian 12 for a couple of years, and I maintain a fairly active homelab where I test (break) things. That said, if Linux hadn’t been a viable solution that met all of the defined requirements, I wouldn’t have recommended it.
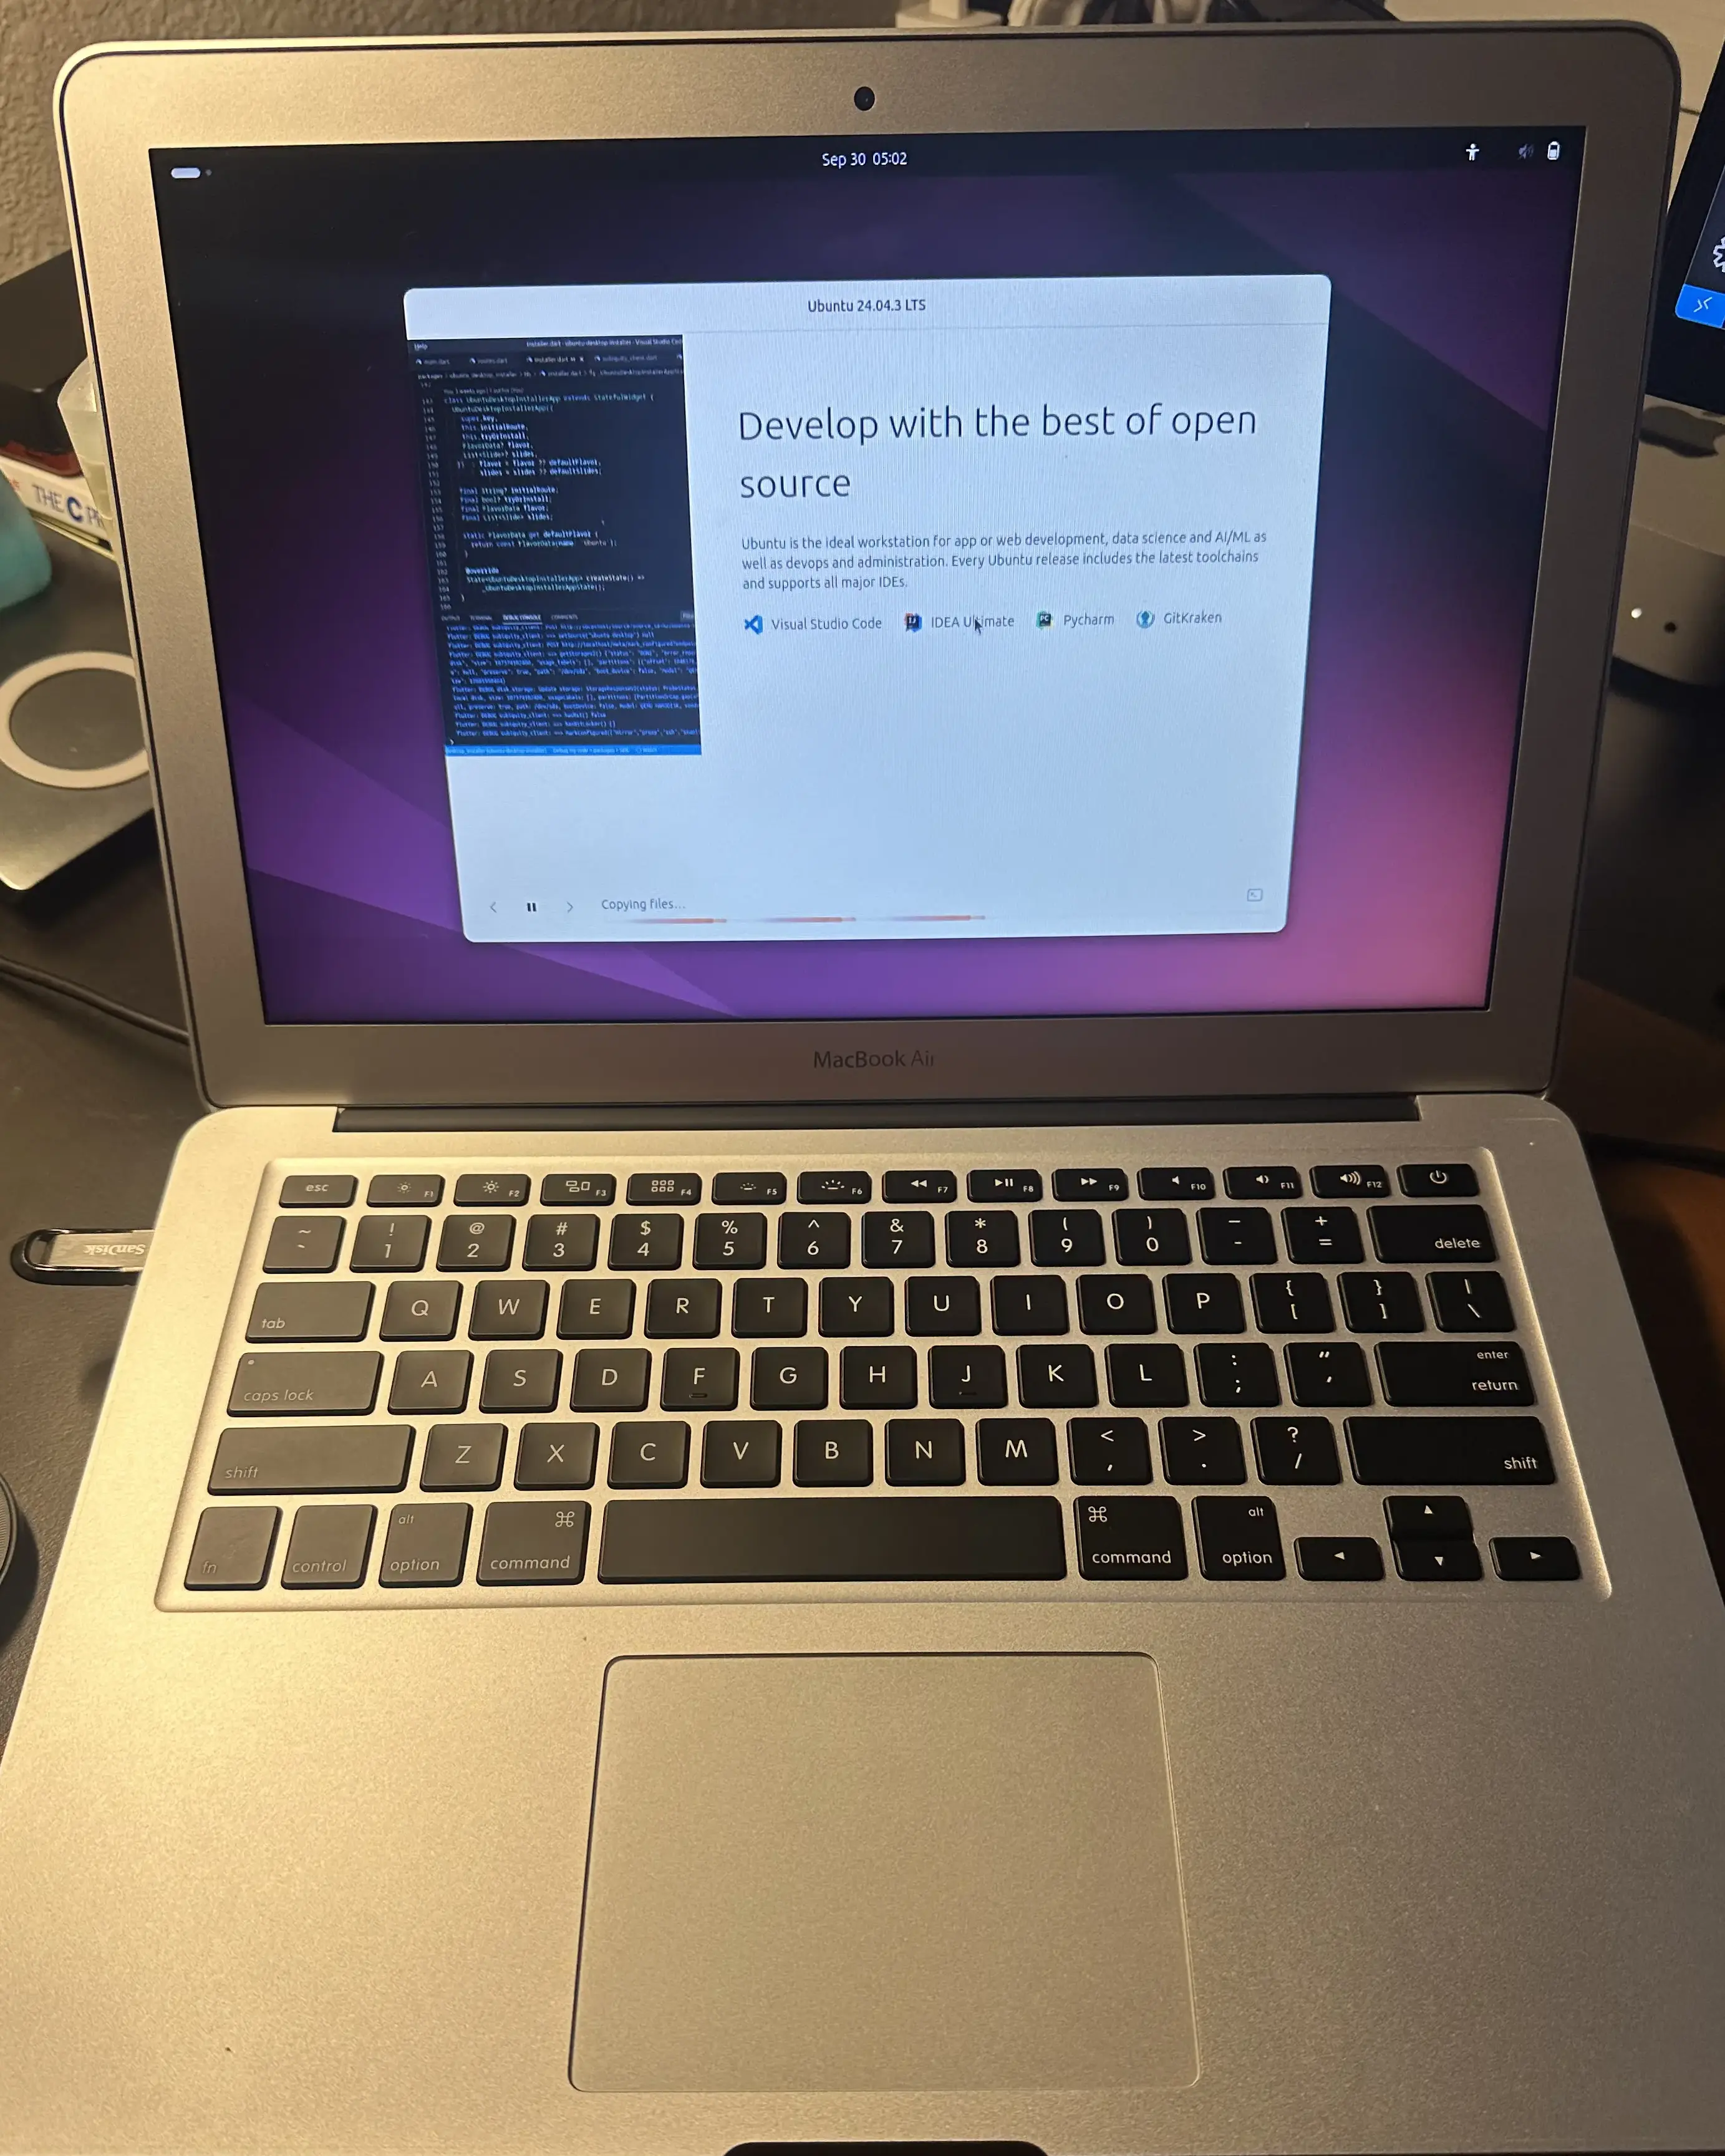
I decided to go with Ubuntu 24.04 LTS. I’m sure there are other distros better suited for this exact use case, but I didn’t want to spend a bunch of time distro hopping and figured I would keep this part simple.
Booting Ubuntu 24.04 LTS on the MacBook Air 2017 from a USB drive quickly showed just how snappy and responsive Linux workstations have become, even on a nearly 10-year-old device.
The deciding factor, though, was discovering that all of the required state testing software now has updated, official support for Ubuntu. That pretty much sealed the deal.
Automating the Install
Out of the box, Ubuntu 24.04 LTS doesn’t support the Broadcom Wi-Fi chipset or the FaceTime HD camera (as of 07/2025). The Wi-Fi problem was especially troublesome, since each device needed to automatically connect to Wi-Fi after a successful install.
During my research on custom Linux ISOs, I came across livefs-editor. Livefs is a Python tool that can make modified versions of live Ubuntu ISOs. Using this tool, I was able to include the missing Wi-Fi drivers as well as various configuration files on the target system.
Here is how I did it:
Step 1: Create a base ISO
Include the packages you want installed on the target machine.
livefs Ubuntu-24.04.iso base.iso --install-packages broadcom-sta-common broadcom-sta-dkms openssh-server avahi-daemon python3 sssd
| Package | Purpose |
|---|---|
| broadcom-sta-dkms | DKMS source for Broadcom STA Wireless |
| broadcom-sta-common | Common files for Broadcom STA Wireless |
| openssh-server | Remote shell, necessary for remote management |
| avahi-daemon | Multicast DNS — allows reaching the device via serial number (mDNS) |
| python3 | Required for Ansible management (Python 3 interpreter) |
| sssd | Daemons to manage authentication (LDAP, Kerberos, FreeIPA) |
Step 2: Add configuration files
After creating the base image, layer in configuration files. In this example, I’m adding the Autoinstall configuration and the Wi-Fi network defined by fleet.nmconnection:
Autoinstall supports Netplan for defining networks, but I ran into failures before the system could come online. As a workaround, I just copy over the
.nmconnectionfile created when joining a network manually.
livefs-edit base.iso fleet.iso \
--add-autoinstall-config 'local/path/to/user-data' \
--cp 'local/path/to/fleet.nmconnection' '$LAYERS[0]/etc/NetworkManager/system-connections/fleet.nmconnection'
user-data
According to Canonical, Ubuntu 24.04 LTS uses the same installer as Ubuntu Server. This means we can utilize the Autoinstall format to define system configurations such as user accounts, storage layouts, etc.
# cloud-config
autoinstall:
version: 1
user-data:
users:
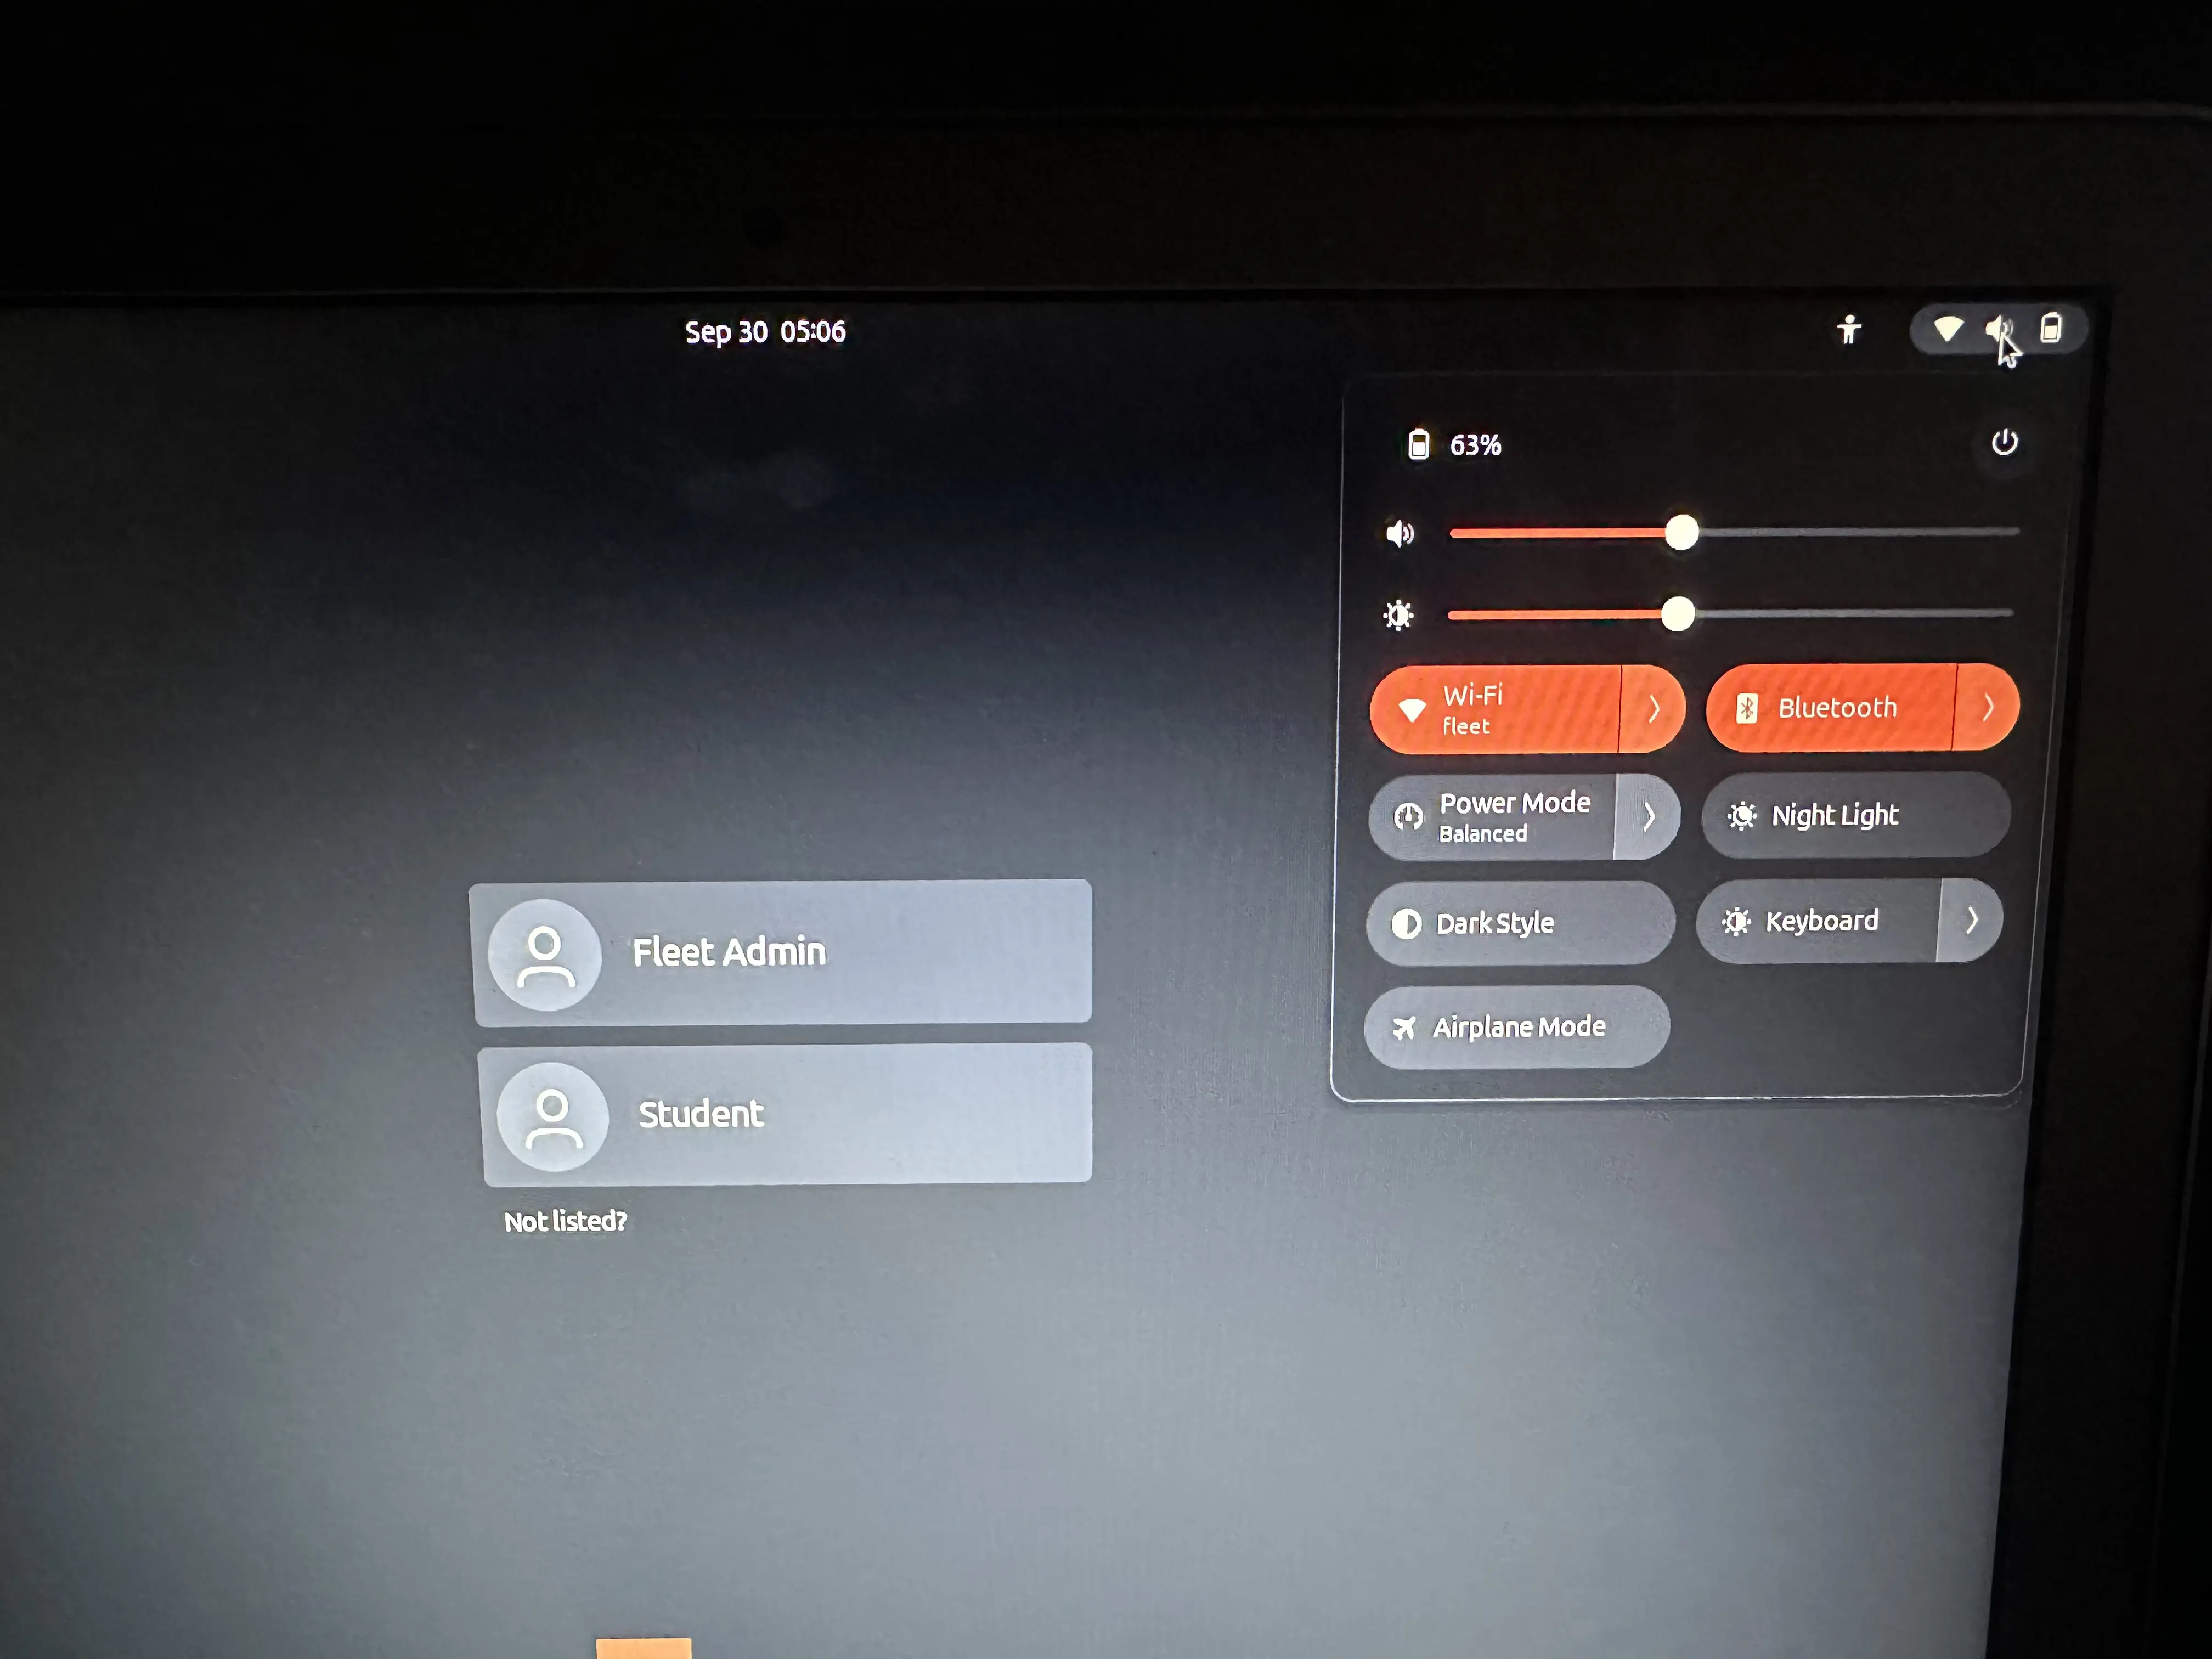
- name: fleet-adm
gecos: "Fleet Admin"
shell: /bin/bash
groups: [sudo]
lock_passwd: false
passwd: '$6$dtVMqYP6iCJ8qH55$uh7GkEhXmQKg4W4zC4PvGOUIFHVrqsz5k7PlOID/rCdspVsj/08ffiN6P/.xRE87hTBO3bQgtwzdnMXZTOVd8/'
ssh_authorized_keys:
- ssh-ed25519 AAAA...
- name: student
gecos: "Student"
shell: /bin/bash
lock_passwd: false
passwd: 'U6aMy0wojraho'
storage:
layout:
name: lvm
late-commands:
# configure Wi-Fi connection “fleet”
- chmod 600 /target/etc/NetworkManager/system-connections/fleet.nmconnection
- chown root:root /target/etc/NetworkManager/system-connections/fleet.nmconnection
# Set hostname to device serial, mDNS will advertise <serial here>.local
- curtin in-target --target=/target -- bash -c 'serial=$(cat /sys/class/dmi/id/product_serial | tr -cd "a-zA-Z0-9"); echo "$serial" > /etc/hostname'
- curtin in-target --target=/target hostnamectl set-hostname "$(cat /etc/hostname)"
- curtin in-target --target=/target -- bash -c 'echo "127.0.1.1 $(cat /etc/hostname)" >> /etc/hosts'
Once complete, the fleet.iso image can be flashed to a USB stick. When booted, it will automatically begin the install process.
Once the install has been completed, the machine will reboot and attempt to connect to the network defined in fleet.nmconnection. Thanks to avahi-daemon, the devices can be discovered via mDNS.
Managing Devices with Ansible
Ansible is an open-source automation tool for handling repeatable tasks across multiple systems. Using an inventory file, you can organize your fleet identified by serial numbers or hostnames and run commands against all devices at once.
For example, we can use the ping module to confirm that each device is connected to the network
$ ansible ubuntu-fleet -m ping -i inventory.ini

FAKE8C33FF01.local | SUCCESS => {
    "ansible_facts": {
        "discovered_interpreter_python": "/usr/bin/python3.12",
        "changed": false,
        "ping" : "pong"
    }
}
FAKE8C33FF02.local | SUCCESS => {
    "ansible_facts": {
        "discovered_interpreter_python": "/usr/bin/python3.12",
        "changed": false,
        "ping" : "pong"
    }
}
...
inventory.ini
[ubuntu-fleet]
FAKE8C33FF01.local
FAKE8C33FF02.local
FAKE8C33FF03.local
FAKE8C33FF04.local
FAKE8C33FF05.local
FAKE9D44AA10.local
FAKE9D44AA11.local
FAKE9D44AA12.local
FAKE9D44AA13.local
FAKE9D44AA14.local
To be continued…
I think this is a good spot to pause for part 2, since this post is already getting long.
In part 2, I’ll walk through managing the fleet we just created using Ansible. We’ll cover how I configured the desktop layout with dconf, install the FaceTime HD webcam driver, set up the Chrome browser, managed users, etc.